How to Create Azure Blob Storage Account Tutorial (2025 Guide)
Complete step-by-step guide to create and configure Azure storage
Azure Blob Storage is a powerful cloud storage service from Microsoft Azure that handles unstructured data efficiently. This Azure storage account setup allows you to store massive amounts of data like images, files, logs, and documents in the cloud with high availability and security. Whether you're building applications, backing up data, or storing media files, Azure cloud storage provides a scalable and cost-effective solution.
In this Azure Blob Storage tutorial, we will walk through the complete cloud storage setup process, explore the key features, see practical examples, and answer common questions to help you get started with Microsoft Azure storage.
Advantages of Using Azure Blob Storage
- Scalable Storage: Store virtually unlimited amounts of data without worrying about capacity limits with Azure storage solutions.
- Cost-Effective: Pay only for what you use with flexible Azure storage pricing tiers (Hot, Cool, Archive) based on access patterns.
- High Availability: Built-in redundancy options ensure your data is always accessible with 99.9% uptime SLA.
- Security: Multiple layers of security including encryption at rest and in transit, plus access control mechanisms for secure cloud storage.
- Global Reach: Available in multiple regions worldwide for better performance and compliance.
- Easy Integration: Works seamlessly with other Azure services and supports REST APIs for custom applications.
Setting up cloud storage can feel overwhelming when you're just starting out. I share practical Azure tutorials and real-world tips in my weekly newsletter to help developers navigate these challenges more easily.
How to Set Up Azure Blob Storage Account
Step 1: Access Azure Portal and Create Storage Account
- Open your web browser and search for "Azure blob storage sign in" or click on the link here.
- Sign in with your Microsoft account or create Azure storage account with "Get Started with Azure"
- Once logged in, search for "storage account" in the top search bar
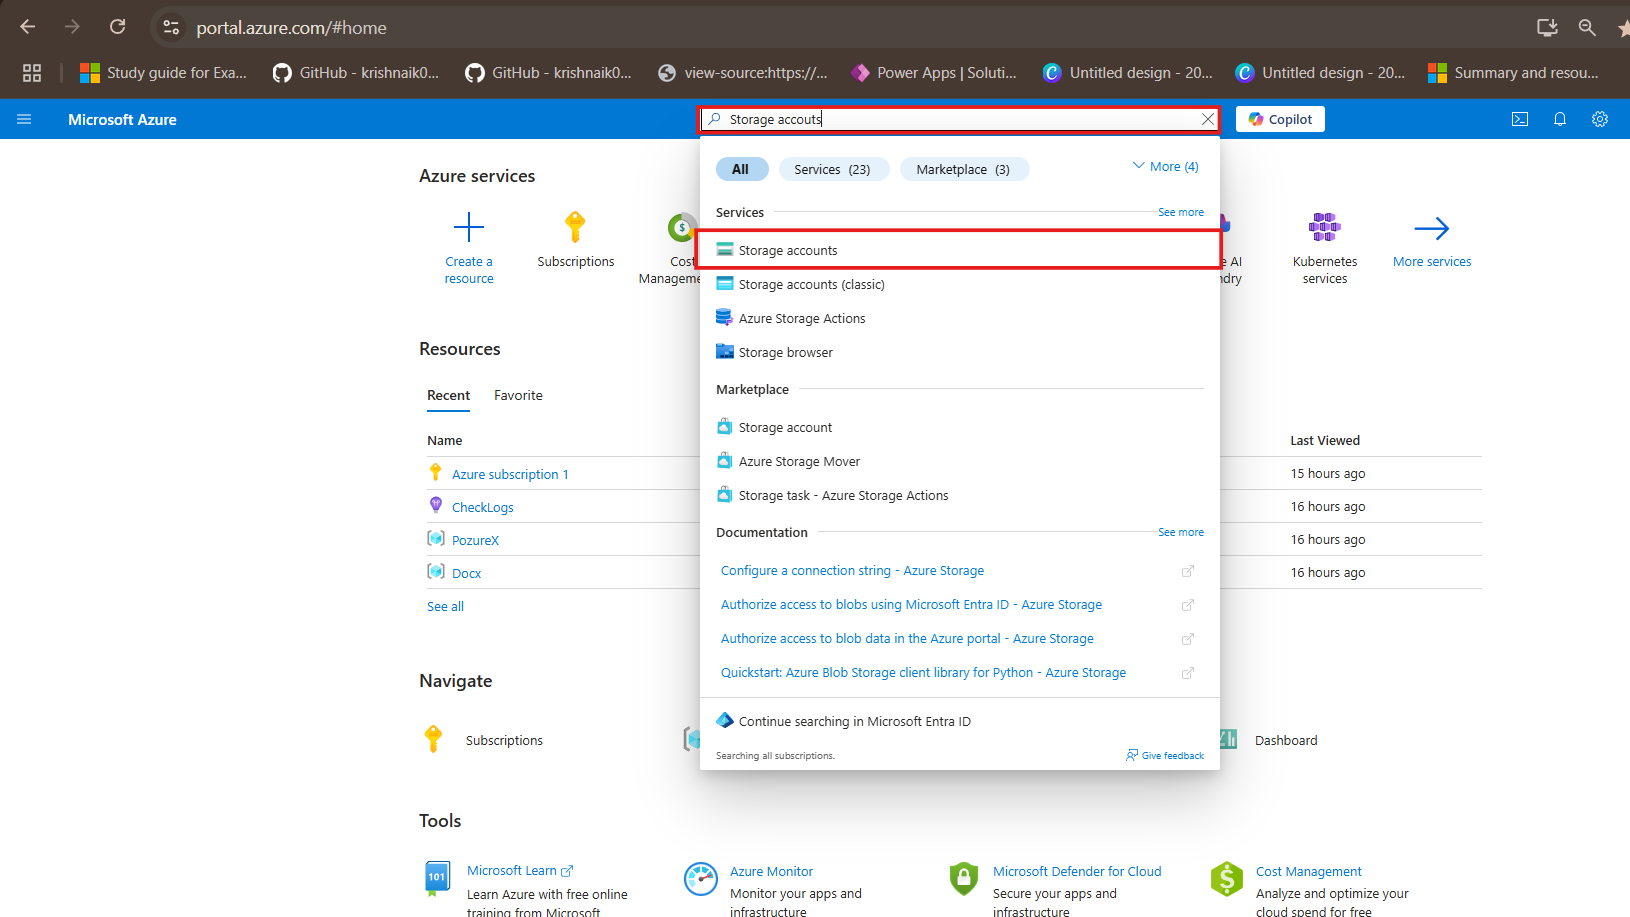
- Select "Storage accounts" from the results
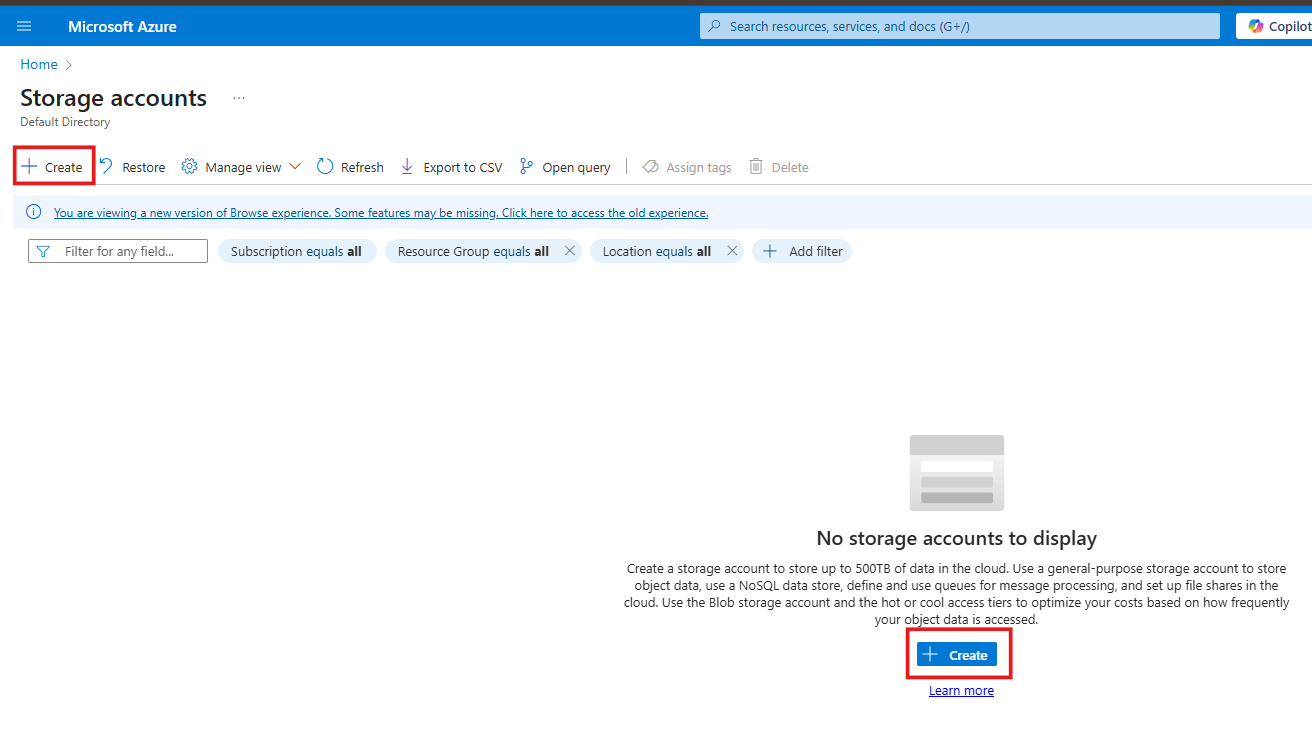
- Click "Create" to start the Azure Blob Storage setup process
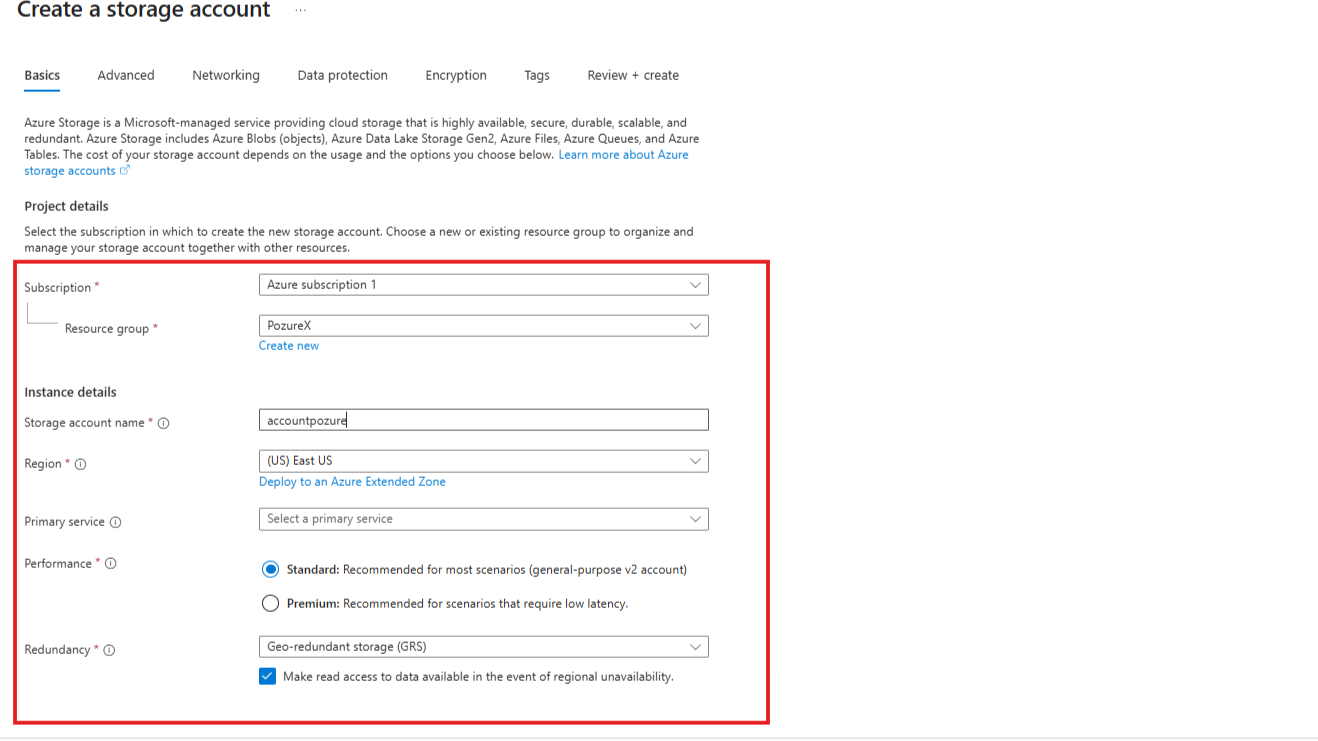
Step 2: Configure Basic Settings
- Resource Group: Create a new resource group or select an existing one to organize your resources
- Storage Account Name: Choose a unique name (3-24 characters, lowercase letters and numbers only)
- Region: Select the location closest to your users for better performance
- Performance: Choose between Standard (cost-effective) or Premium (low latency) for your Azure storage configuration
- Redundancy: Select your preferred backup option (LRS, GRS, ZRS, etc.)
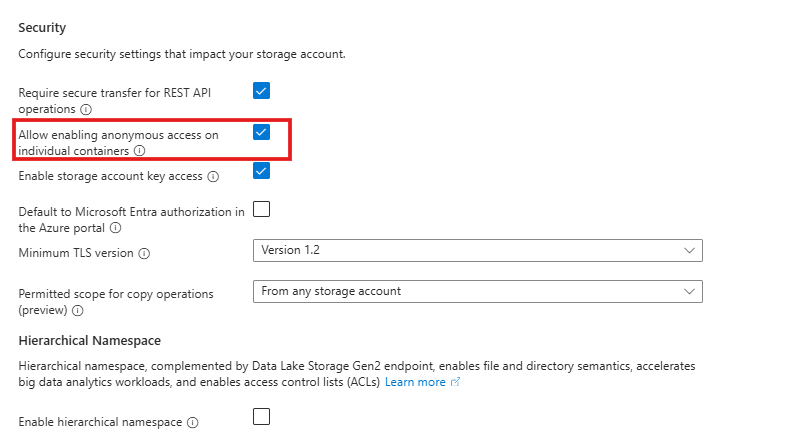
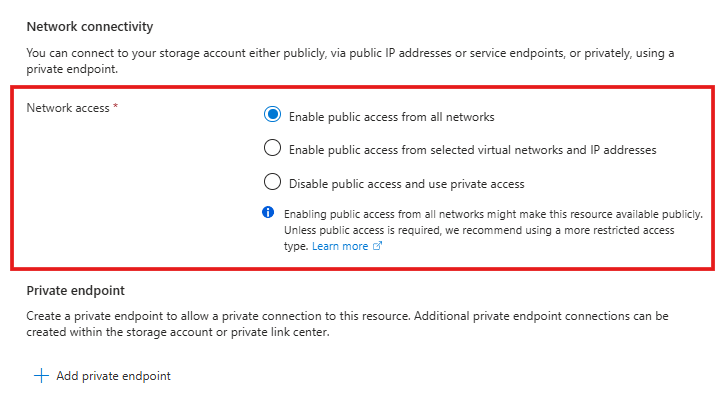
Step 3: Configure Advanced Options
- Security Settings: Enable "Allow Blob public access" if you plan to make some containers publicly accessible
- Access Tier: Choose between Hot (frequently accessed) or Cool (infrequently accessed) as default

- Network Access: Select "Enable public access from all networks" for basic setup
- Click "Review + Create" to validate your settings
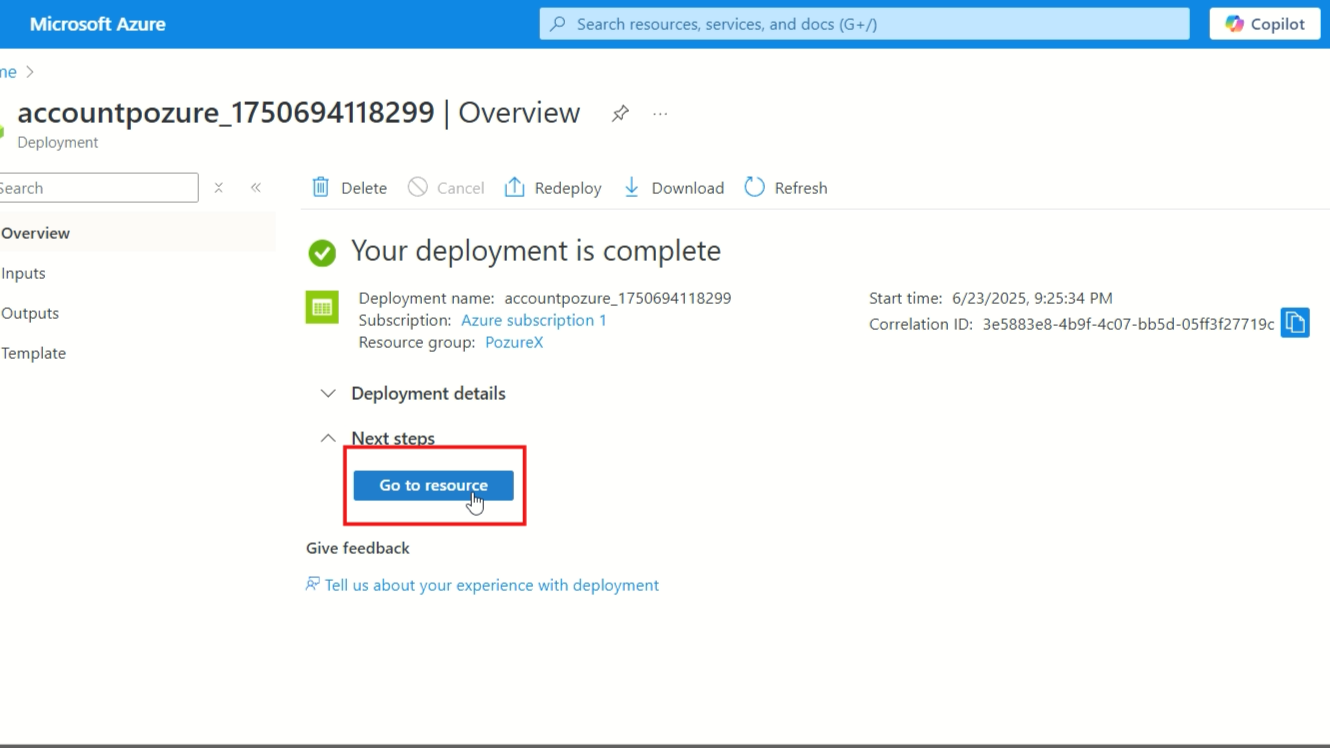
Step 4: Deploy and Access Your Storage Account
- Review all configurations and click "Create"
- Wait for deployment to complete (usually 1-2 minutes)
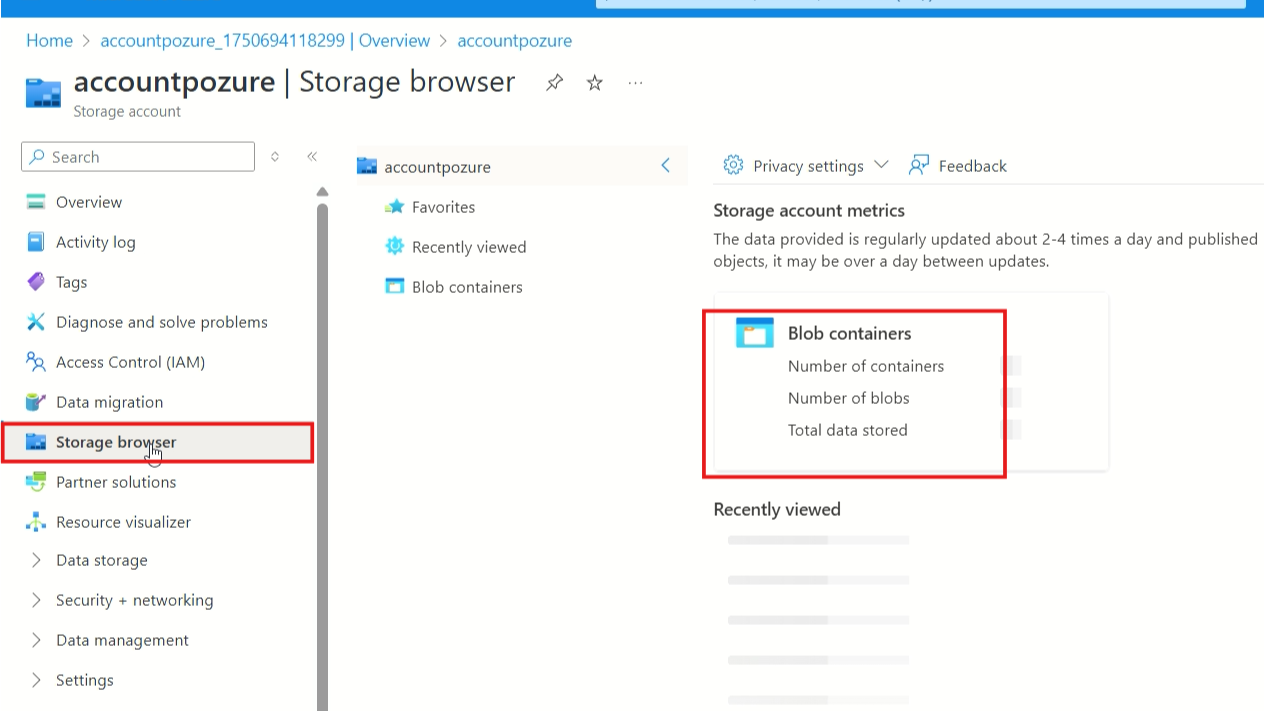
- Click "Go to resource" to access your new storage account
- Navigate to "Storage browser" in the left menu to start managing your data
If you're running into issues with the setup or have specific questions about your Azure configuration, I offer consultation calls to help troubleshoot and provide personalized guidance.
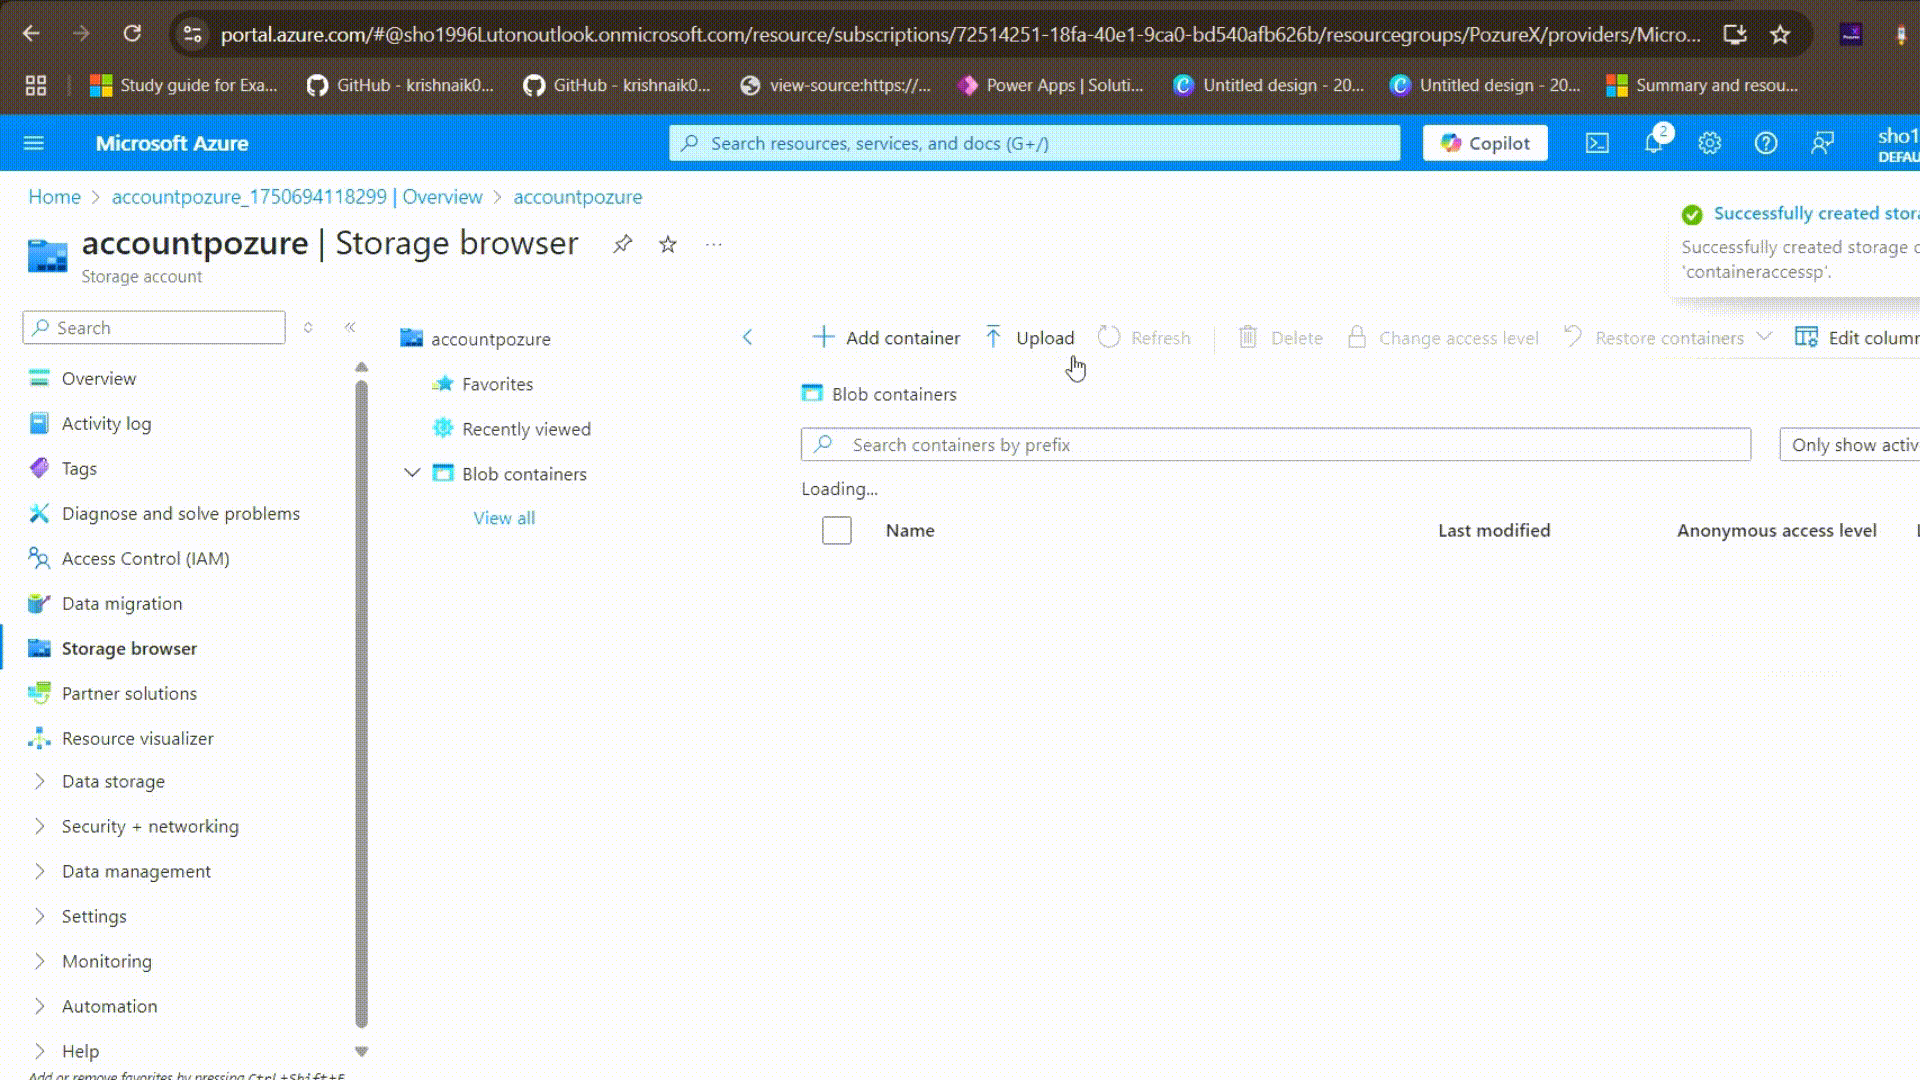
Step 5: Create and Configure Containers
- In the Storage browser, click on "Blob containers"
- Click "Add container" to create a new container
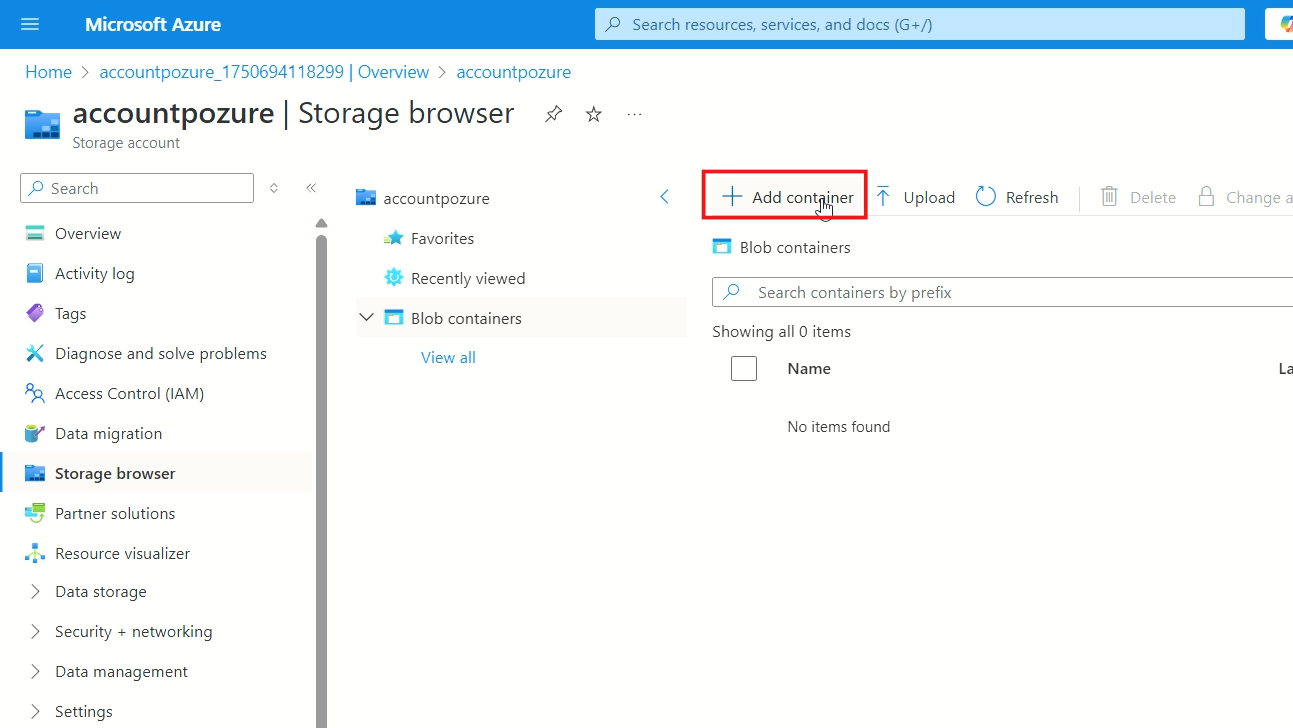
- Enter a container name (use lowercase letters, numbers, and hyphens)
- Set the access level for your Azure Blob Storage containers:
- Private: No anonymous access
- Blob: Anonymous read access for blobs only
- Container: Anonymous read access for containers and blobs
- Click "Create" to finalize the container
Step 6: Upload Files to Your Container
- Click on your newly created container
- Click the "Upload" button in the toolbar
- Select files from your local computer using the file picker
- Configure upload options:
- Overwrite existing files (if needed)
- Folder structure preservation
- Access tier selection
- Click "Upload" to transfer your files to the cloud
Step 7: Configure Access and Security
- Access Keys: Go to "Access keys" in the left menu to view your storage account keys
- Shared Access Signatures: Create SAS tokens for time-limited access to specific resources
- Access Control (IAM): Assign roles to users who need access to your storage account
- Firewall and Virtual Networks: Configure network access rules for enhanced security
Understanding Azure Blob Storage Pricing
Azure storage pricing uses a pay-as-you-go model with several cost components. Understanding these cloud storage costs is crucial for budget planning:
Storage Costs
- Hot tier: Higher storage cost, lower access cost
- Cool tier: Lower storage cost, higher access cost
- Archive tier: Lowest storage cost, highest access cost
Operation Costs
- Write operations: Creating, uploading, and modifying data
- Read operations: Downloading and listing data
- Delete operations: Removing data from storage
Data Transfer Costs
- Inbound data: Usually free
- Outbound data: Charged after free tier limits
To estimate costs, use the Azure pricing calculator by searching for "Azure pricing calculator" and selecting Storage Accounts. This tool helps you plan your Azure storage costs effectively.
Cloud costs can add up quickly if not managed properly. If you'd like to discuss cost optimization strategies for your specific use case, I'm happy to hop on a call and share some insights.
Frequently Asked Questions
What types of data can I store in Azure Blob Storage?
You can store any type of unstructured data including images, videos, documents, logs, backups, and application data.
What's the difference between containers and blobs?
Containers are like folders that organize your data, while blobs are the actual files stored within those containers.
Can I access my data from anywhere?
Yes, Azure Blob Storage is accessible from anywhere via REST APIs, Azure portal, or various client tools and SDKs.
How secure is Azure Blob Storage?
Very secure. It includes encryption at rest and in transit, access control mechanisms, and compliance with major security standards.
What's the maximum file size I can upload?
You can upload files up to 4.75 TB in size for block blobs, which covers most use cases.
Can I integrate Azure Blob Storage with my applications?
Yes, Azure provides SDKs for various programming languages including .NET, Java, Python, Node.js, and REST APIs for custom integration.
I hope this tutorial helped you get your Azure Blob Storage up and running. I regularly share more Azure guides and practical tips through my newsletter if you'd like to stay connected.